Bu nasıl yardımcı olacak?
Bu ayrıntılı kılavuz, oyun sırasında gerçekleştirilen çeşitli eylemler için sezgisel komut dosyaları oluşturarak oyun deneyiminizi geliştirmenize yardımcı olacaktır.
Bu makale aşağıdaki soruları cevaplayacaktır:
BlueStacks'te betikleri çalıştırmak için hangi komutlar mevcuttur?
Komut dosyası oluşturmak için Kontroller Düzenleyicisi nasıl açılır
Komut dosyası oluşturmak için Kontrol Düzenleyicisi nasıl kullanılır?
Daha fazlasını okumadan önce, BlueStacks'te komut dosyalarını nasıl kullanacağınızı öğrenmek için bu videoyu izleyin.
BlueStacks üzerinde komut dosyalarını çalıştırmak için komutlar
Komut dosyaları, belirli bir tuşla tetiklenebilen eylem dizileridir (tuş vuruşları, fare tıklamaları, gecikmeler vb.). Mevcut anahtar eşleme kontrolünü genişletmek için güçlü bir özelliktir. Herhangi bir işlem sırasını istediğiniz gibi tanımlayabilir ve kendi özel tuşunuzu kullanarak etkinleştirebilirsiniz.
BlueStacks'te komut dosyaları için mevcut komutlar:
| Keyword |
Syntax |
Short Description |
| # |
# this is a comment |
Comments begin with #. Everything until the end of the line is considered comment and is ignored.
A comment can be on a line by itself or can be placed at the end of a command on the same line. |
| keyDown |
keyDown key
e.g.
keyDown TAB |
Key is pressed and is not released until the keyup is encountered for the same key.
Mapping for the key is executed if one exists; otherwise, the key down input is forwarded to android. |
| keyDown2 |
keyDown2 key
e.g.
keyDown2 TAB |
Key is pressed and is not released until the keyup is encountered for the same key.
Mapping is not executed and key down input is forwarded to android. |
| keyUp |
keyUp key
e.g.
keyup TAB |
Key is released. Mapping is executed if one exists; otherwise, key up input is forwarded to android. |
| keyUp2 |
keyup2 key
e.g.
keyup2 TAB |
Key is released. Mapping is not executed and key up input is forwarded to android. |
| mouseDown |
mouseDown x y
e.g.
mouseDown 44.0 55.5 |
Mouse left button is pressed at location x, y. All locations are in screen percentages so that the same script can work across different resolutions. |
| mouseUp |
mouseUp |
Mouse left button is released. No coordinates are required. |
| mouseMove |
mouseMove x y
e.g.
mouseMove 4.56 5.67 |
Mouse moves to new location x, y |
| touch |
touch x1 y1 x2 y2 x3 y3
e.g.
# 3 fingers
touch 4 5 6 7 8 9
# 3rd finger lifted
touch 4 5 6 7
# fingers 1 and 2 move
touch 5 6 7 8
# fingers 1 and 2 lifted
touch |
Touch input with the current set of touchpoints specified. Series of touch commands can be used to create arbitrary multi-touch input.
Up to 16 touchpoints are supported. But keep in mind that other touchpoints from other controls are aggregated before sending to android. |
| text |
text “text”
text backspace 2
e.g.
text “hello world” |
Send text input to android. This can be in any language. The format should be utf8. |
| mouseWheel |
mouseWheel x y d
mouseWheel 44.0 55.5 1
mouseWheel 44.0 55.5 -1 |
Send mousewheel event to keymapping which will convert it to zoom or scroll accordingly |
| wait |
wait msecs
e.g.
wait 24 |
Waits for the specified number of milliseconds before executing the next command. |
Higher Level Primitives.
| Keyword |
Syntax |
Short Description |
| onMouseMove |
onMouseMove |
This provides finer control over execution of script. Different sets of commands can be provided for executing when the mouse is moved.
Commands following the onMouseMove command are executed when the trigger key is pressed and mouse cursor is moved
|
| dTouch |
dTouch x+a y+b x+c y+d… x+u x+v
# take two touch points x+3 y x-3 y
dTouch x+3 y x-3 y
|
dTouch can be used to make a touch gesture on screen with offset to current mouse location x y. Multiple points may be specified to generate the touch point.
a,b,c,d are offsets of the touch points from the current mouse location x y.
|
| abort |
abort |
Abort execution of the script.
|
| tap |
tap x1 y1 x2 y2 … xn yn delay |
This does a tap gesture. Single or multiple touchpoints can be specified. The touchpoint(s) are held for a specified delay. If the delay is not specified it is assumed to be 50msec.
Delay is specified in milliseconds. This is the amount of time the entire swipe gesture takes.
Up to 16 touchpoints are supported. But keep in mind that other touchpoints from other controls are aggregated before sending to android.
|
| swipe |
swipe x1 y1 x2 y2 … xn yn delay
e.g.
# swipe 4,5 to 40,45
# take 100msecs
swipe 4 5 40 45 100 |
Do a swipe gesture. Multiple points may be specified which the swipe goes through.
Delay is specified in milliseconds. This is the amount of time the entire swipe gesture takes. |
| loop / loopEnd |
loop n
.
.
loopEnd |
Commands following loop command until loopEnd are executed n times.
If n is not specified the loop continues indefinitely or until the macro trigger key is released. |
| onRelease |
onRelease |
This provides finer control over the execution of the script. A different set of commands can be provided for executing when the trigger key is pressed and released.
All commands from the top of the script until the onrelease command are executed when trigger key is pressed. Commands following the onrelease command are executed when trigger key is released. |
| enterShoot |
enterShoot |
Enter shooting mode used to play FPS games. If a Pan control does not exist in the current scheme this is ignored. If shooting mode is already enabled this has no effect. |
| exitShoot |
exitShoot |
Exit shooting mode. If a Pan control does not exist in the current scheme this is ignored. If shooting mode is disabled this is ignored. |
| toggleShoot |
toggleShoot |
Toggle shooting mode. If a Pan control does not exist in the current scheme this is ignored. |
Komut dosyası oluşturmak için Kontroller Düzenleyicisini açma
Bir komut dosyası oluşturmak için, komut dosyaları oluşturmak istediğiniz oyunu başlatmanız ve ardından Kontrol Düzenleyicisini açmanız gerekir. Kontrol Düzenleyicisine nasıl erişeceğinizi öğrenmek için aşağıdan BlueStacks sürümünüzü seçin:
BlueStacks 4.230 ve üzeri
BlueStacks 4.220 ve altı
BlueStacks 4.230 ve üstü için
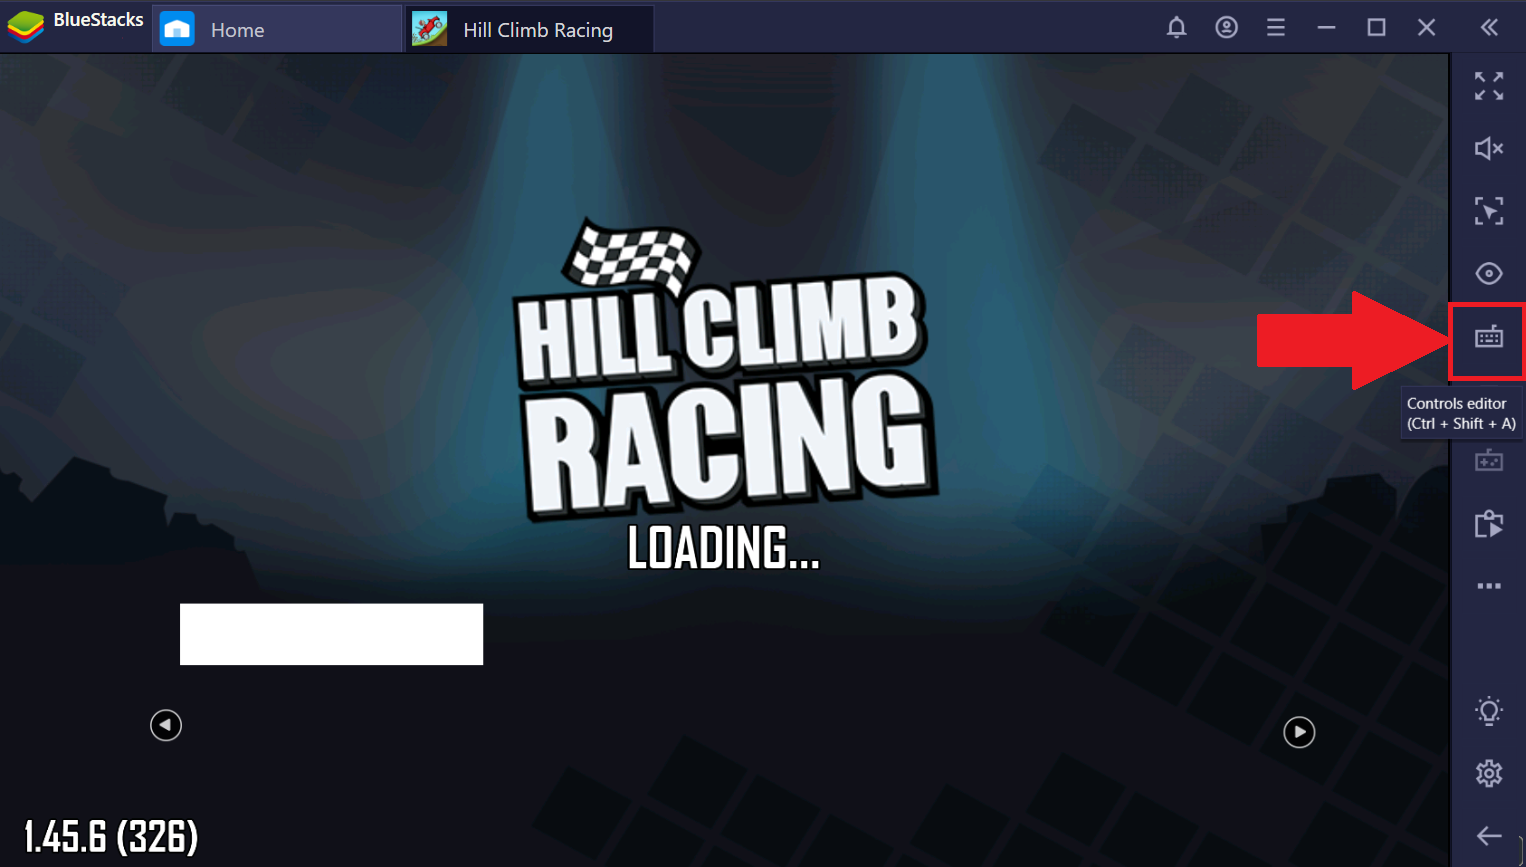
BlueStacks 4.230'da Kontrol Düzenleyicisine erişmenin iki yolu vardır:
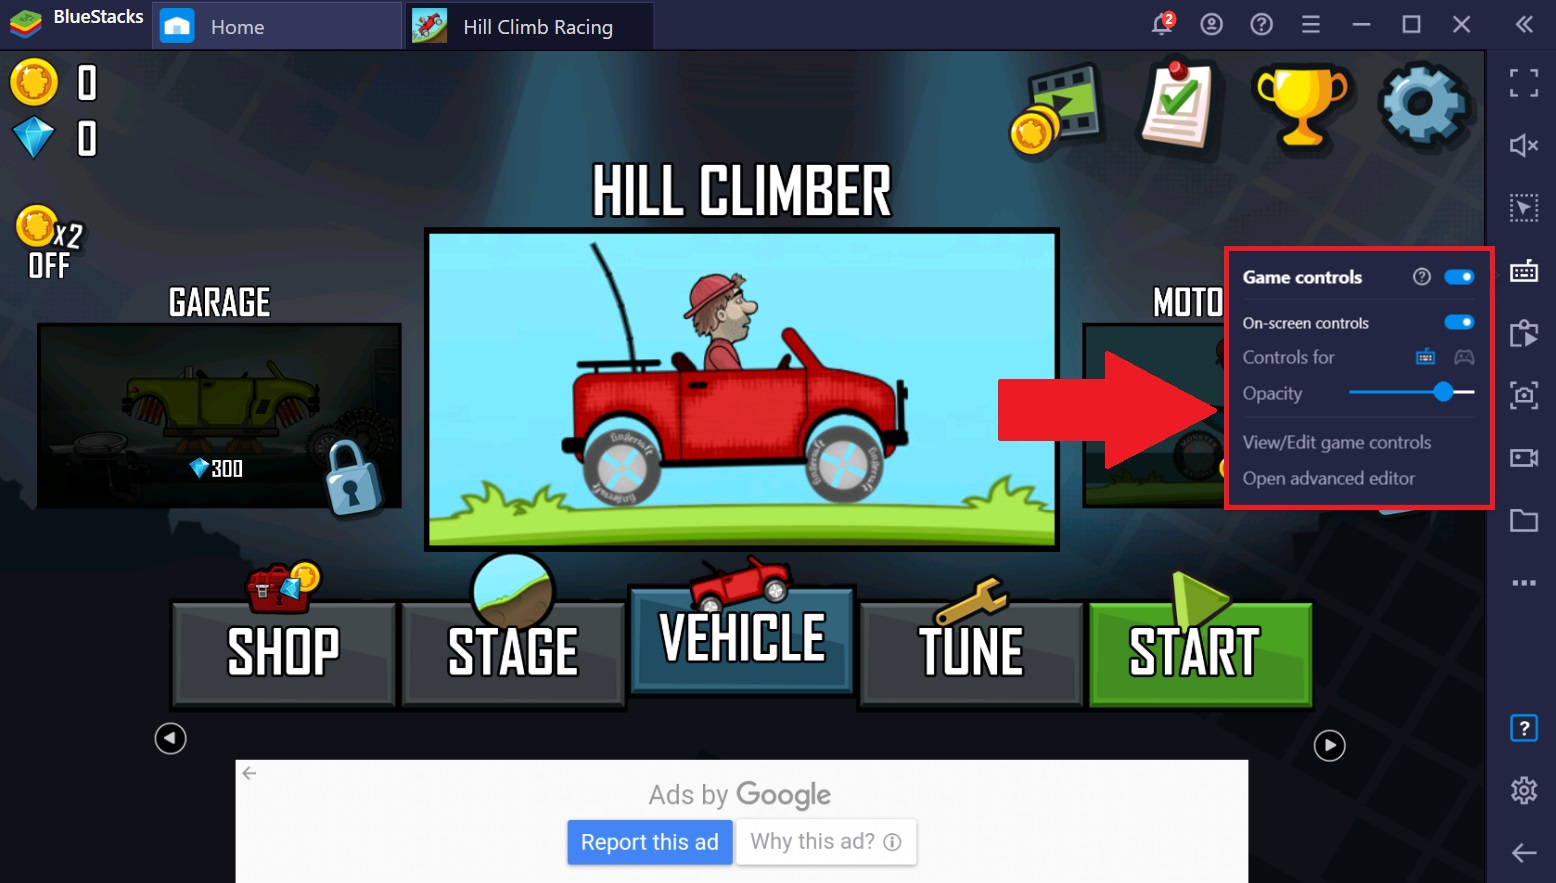
Aşağıda gösterildiği gibi, bir oyun oynarken yan araç çubuğundaki Oyun Kontrolleri simgesine sağ tıklayarak.
- Oyun kontrolleri simgesine sol tıklayıp menüden Gelişmiş düzenleyiciyi aç'ı seçerek.
BlueStacks 4.220 ve altı için
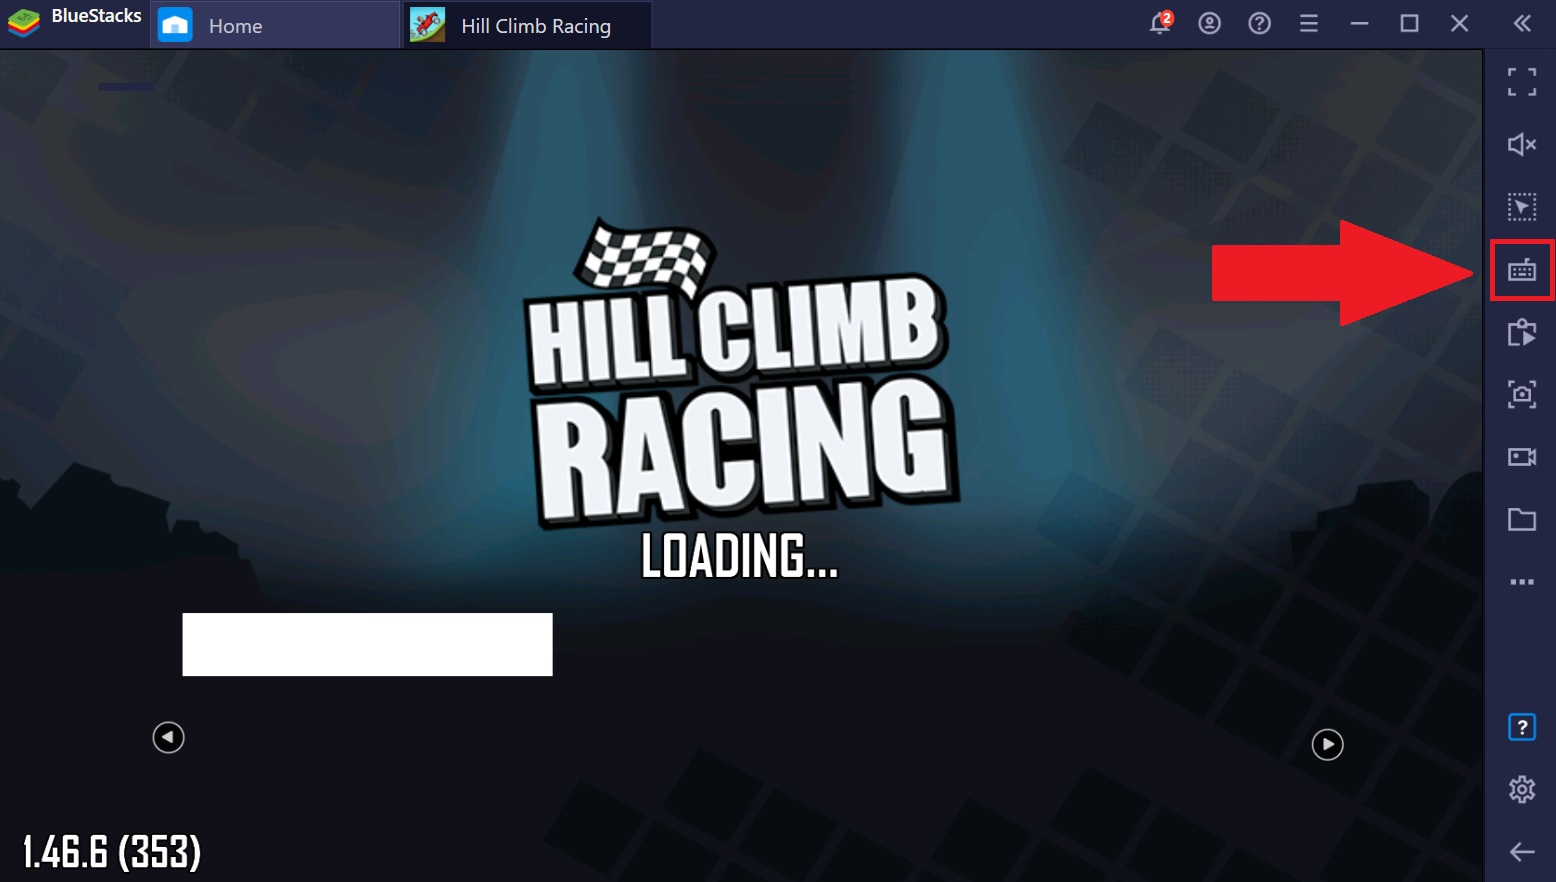
Aşağıda gösterildiği gibi yan araç çubuğundaki klavye kontrol simgesine tıklayın.
Komut dosyası oluşturmak için Kontrol Düzenleyicisini kullanma
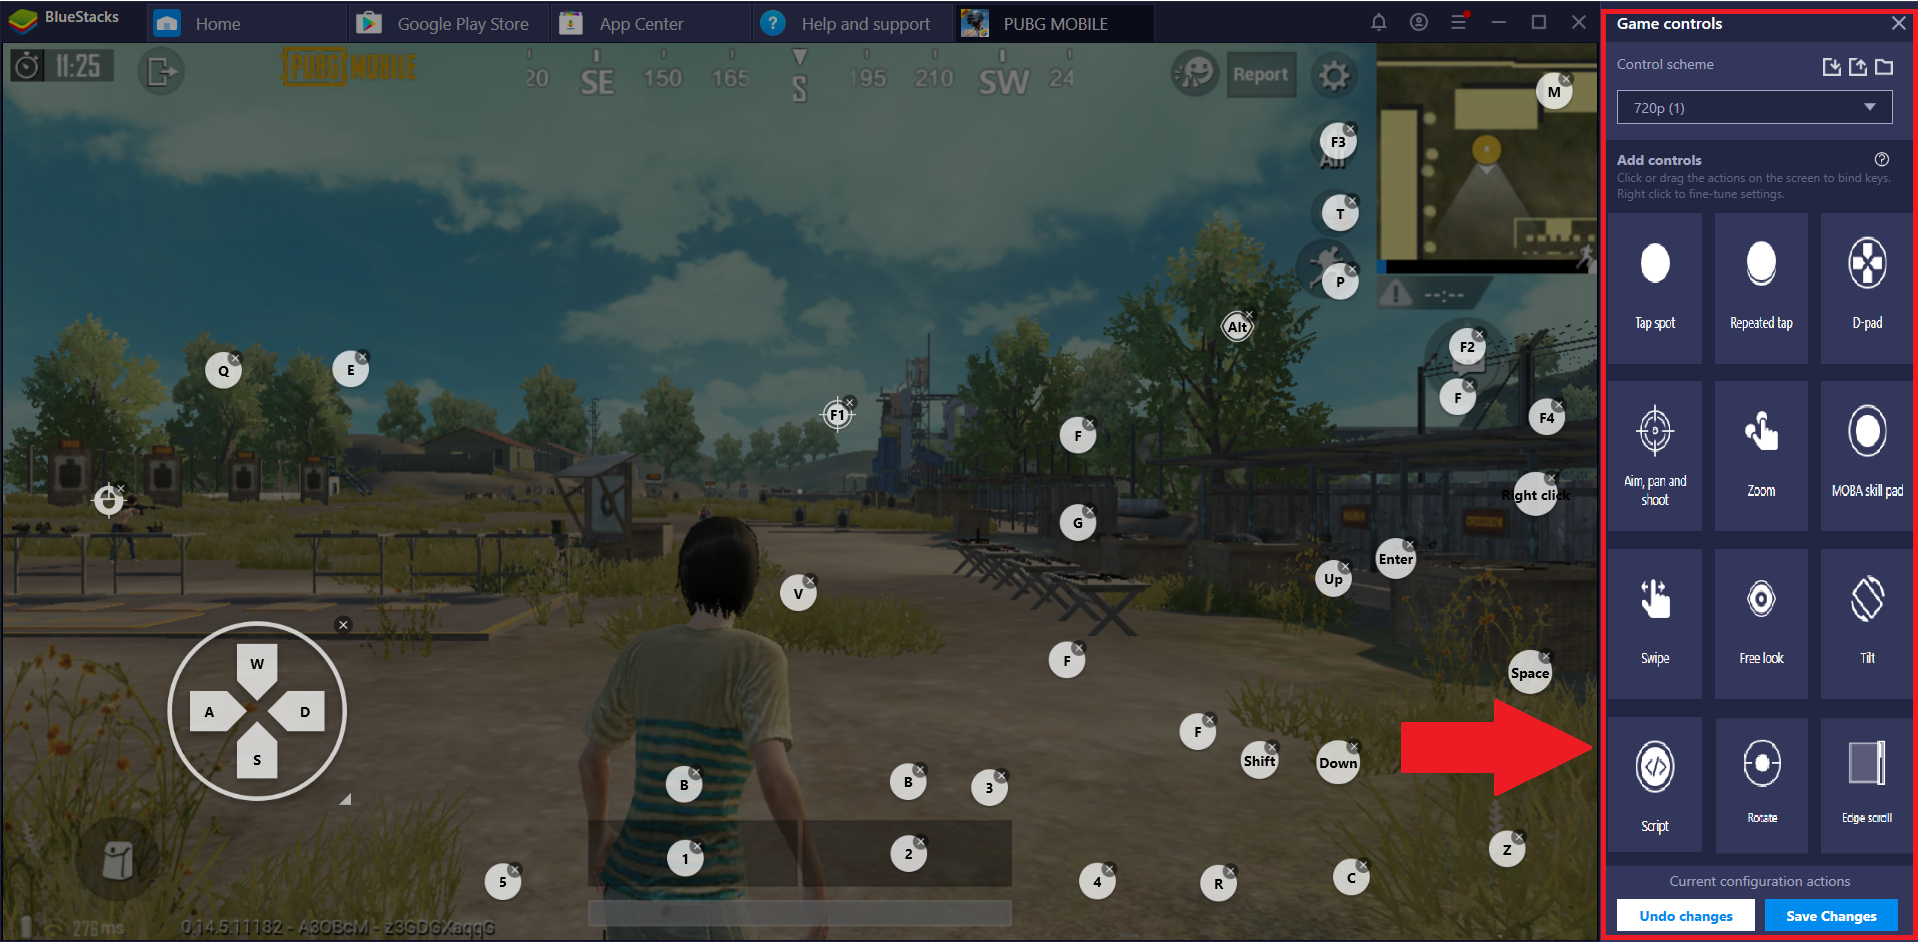
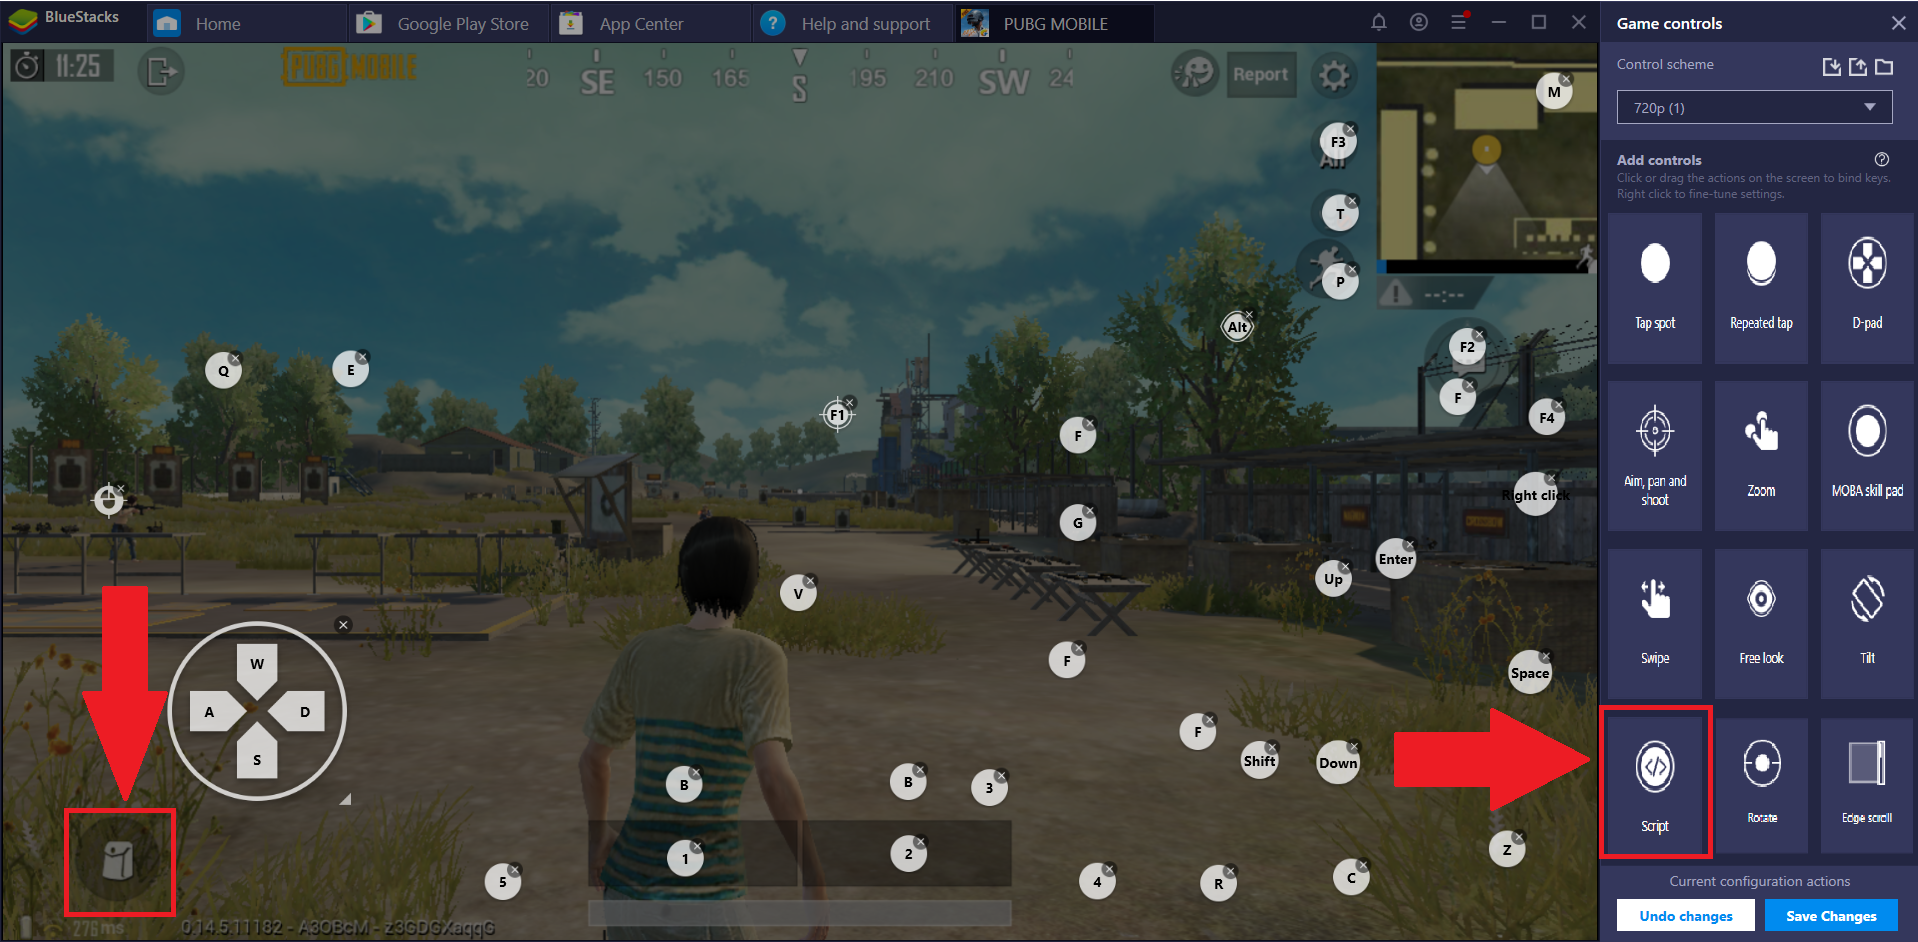
Kontrol Düzenleyicisini açtığınızda, aşağıda gösterildiği gibi, yanında yeni bir pencere görünecektir. Oluşturmak istediğiniz anahtar kontrol türleri için size çeşitli seçenekler sunulacak.
1. Bir komut dosyası oluşturmak için, komut dosyası düğmesini Kontrol Ekle menüsünden sürükleyin ve işlevsel bir alana bırakın. Açıklama amacıyla aşağıdaki resimde görüldüğü gibi sol alt köşedeki çanta ikonuna bırakalım.
2. Şimdi, bu işlev için bir anahtar atayın. Burada, komut dosyası olarak eklenen komutu başlatmak için SEKME düğmesi atanır.
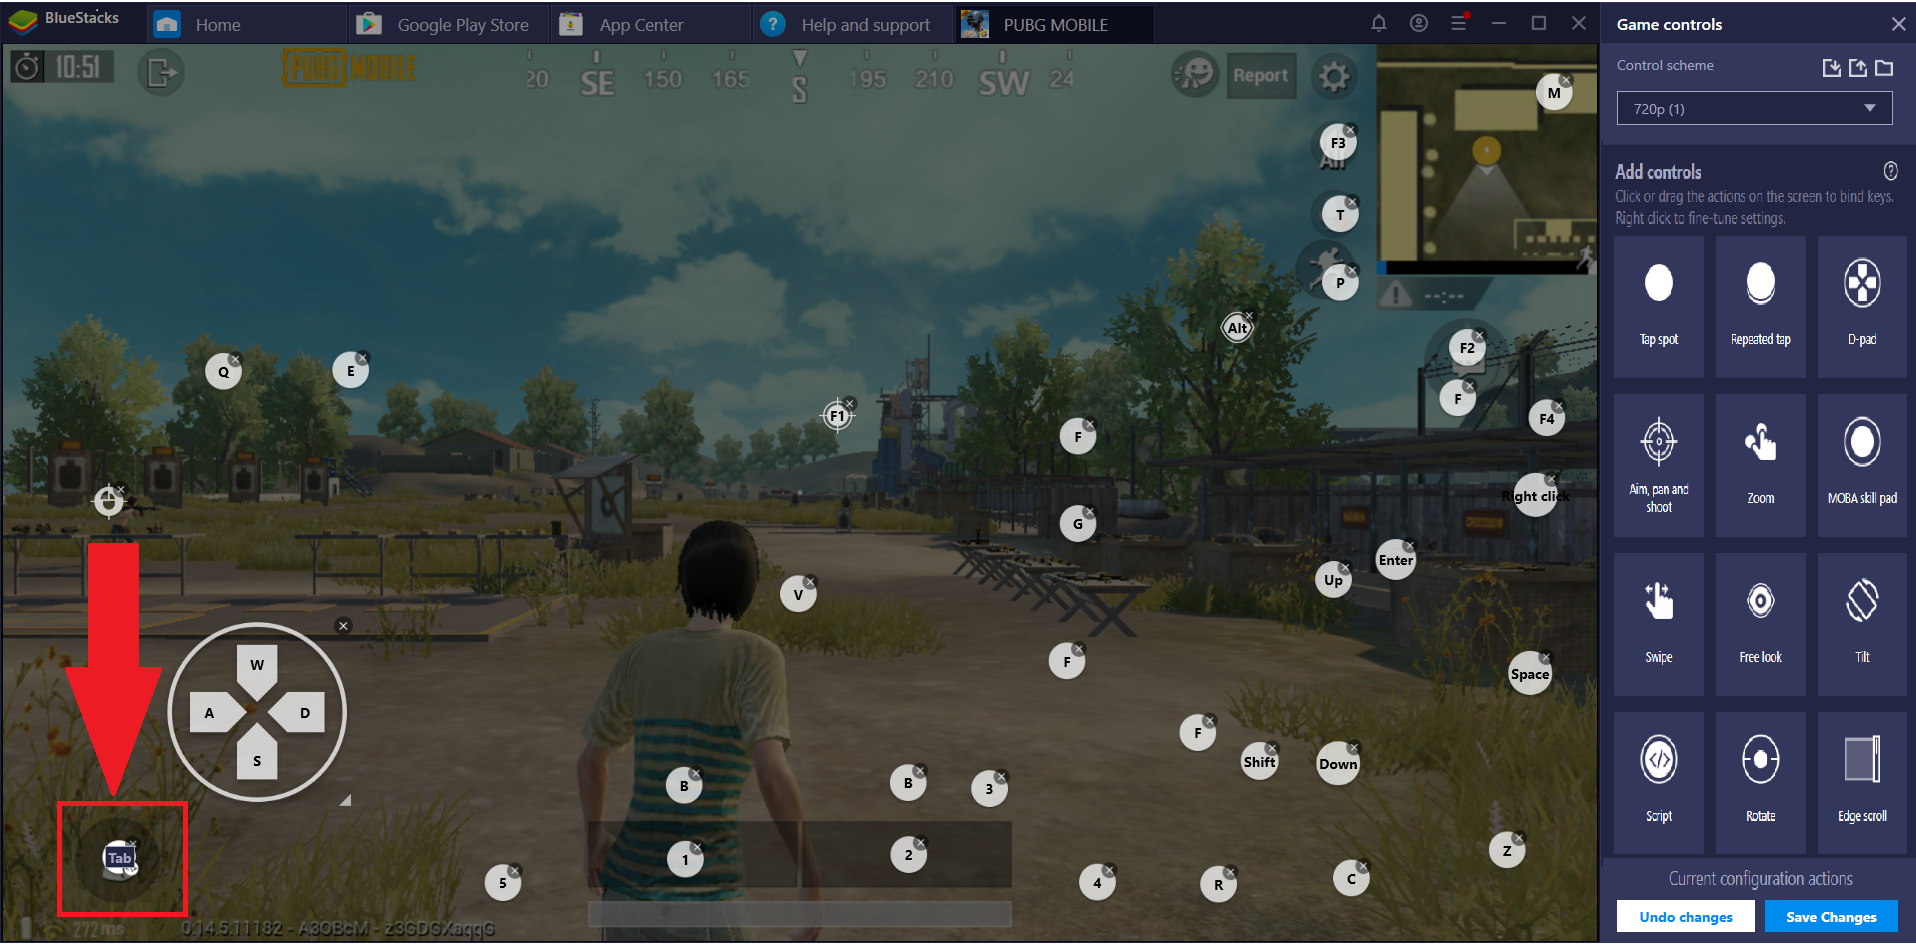
3. Bu Komut Dosyası için komutları eklemeye başlamak için komut dosyası düğmesinin altındaki "<\>" simgesine tıklayın.
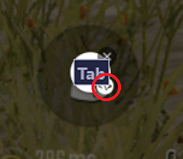
4. "<\>" simgesine tıkladığınızda, imleç koordinatları ekranda görünmeye başlayacaktır. Ekrandaki bir noktaya sağ tıkladığınızda, o noktanın koordinatları aşağıda gösterildiği gibi komut dosyası düzenleyicide gösterilecektir.
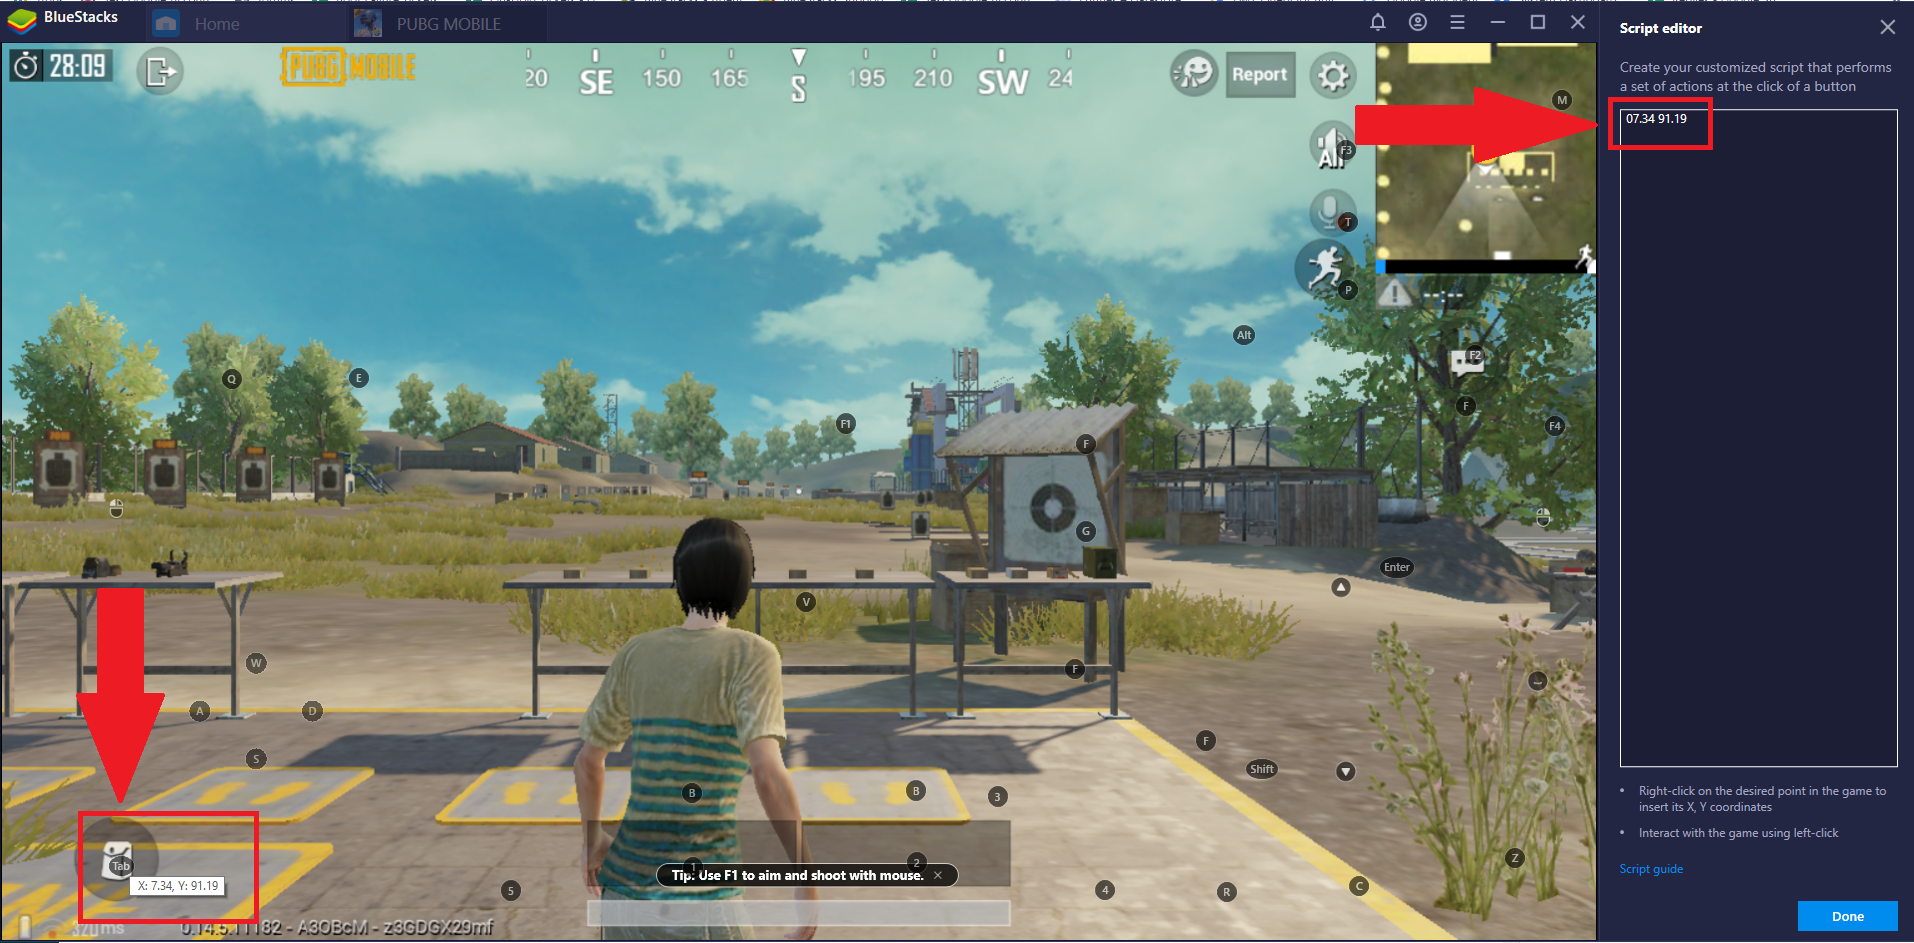
Burada, çanta simgesine sağ tıklama yapıldı.
5. Görüntülenen koordinatlara karşı komut dosyası komutları eklemeye başlayabilirsiniz.
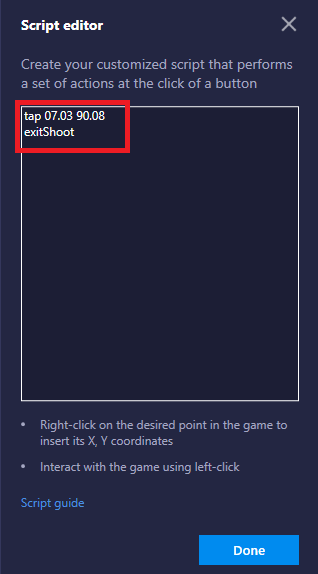
İşte komut:
koordinatlara hafifçe vurmak, TAB tuşuna bastığımızda çanta simgesine bir kez dokunacağı anlamına gelir.
Koordinatlara göre exitShoot, TAB tuşuna bastığımızda oyunda Çekim modundan çıkacağı anlamına gelir.
Komutları ekledikten sonra, tamam düğmesine tıklayın.
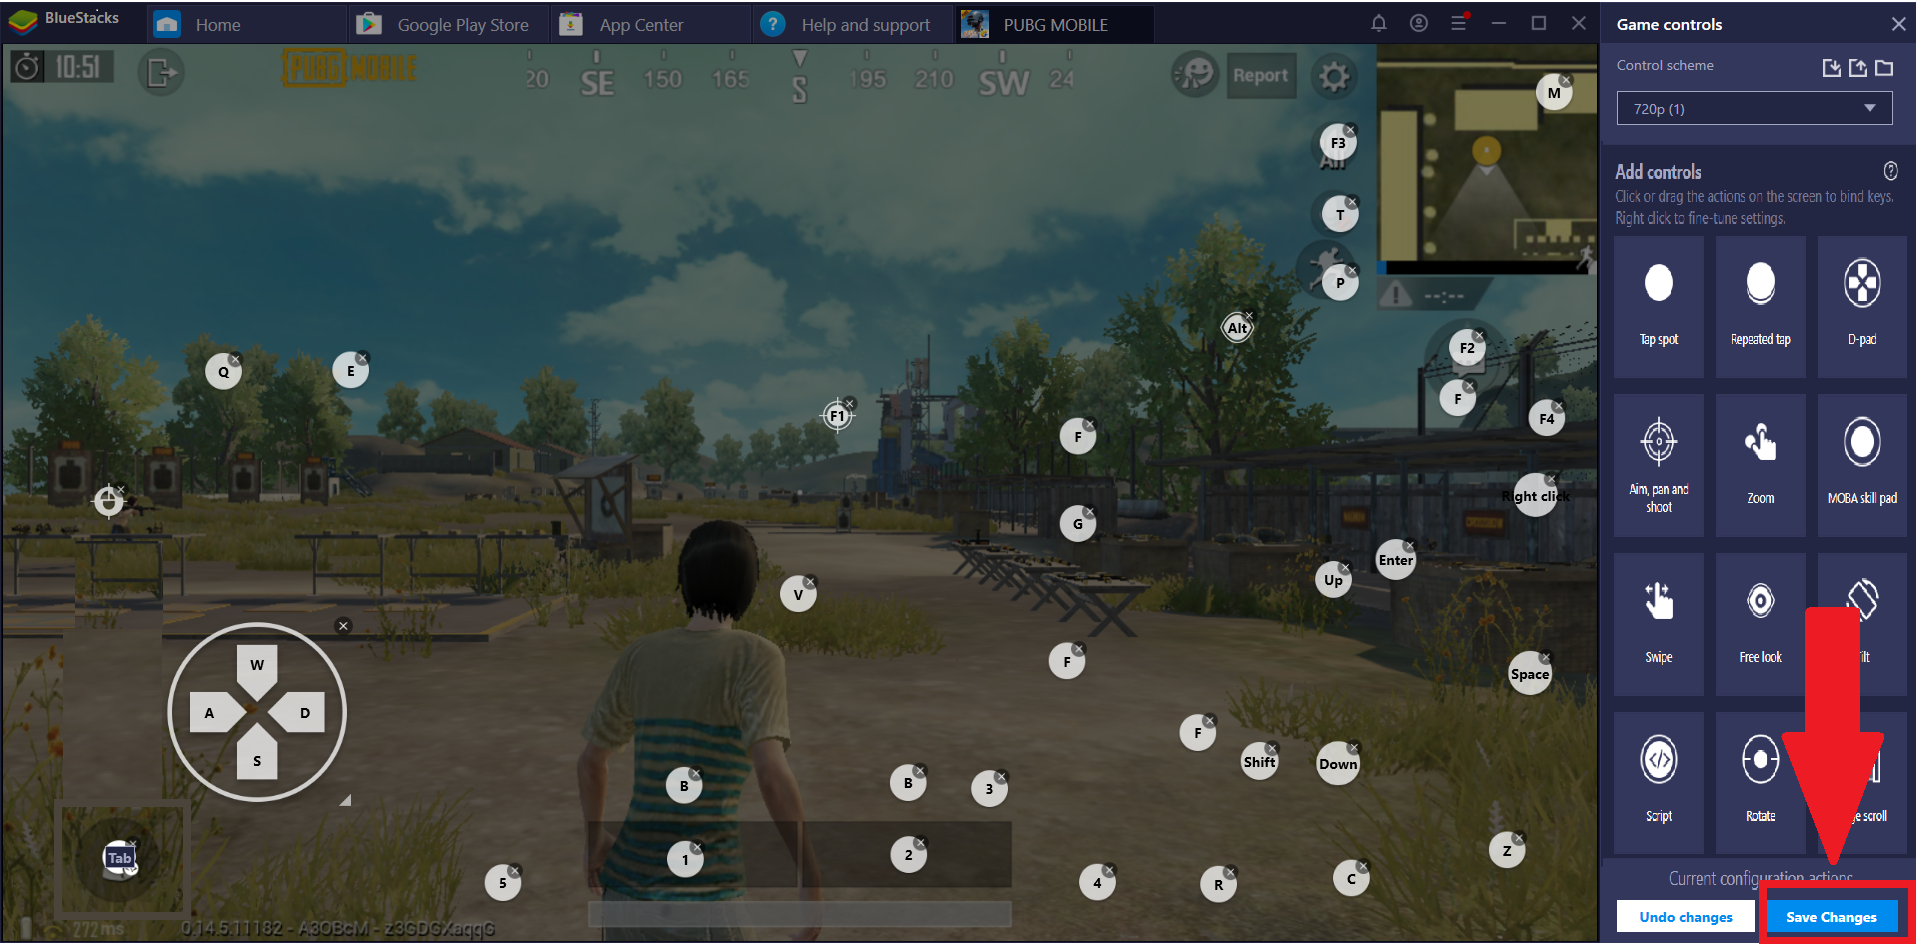
6. Değişiklikleri kaydet üzerine tıklayın.
7. Değişiklikler kaydedildikten sonra, aşağıda gösterildiği gibi X'e tıklayarak Kontrol Düzenleyicisini kapatabilirsiniz.

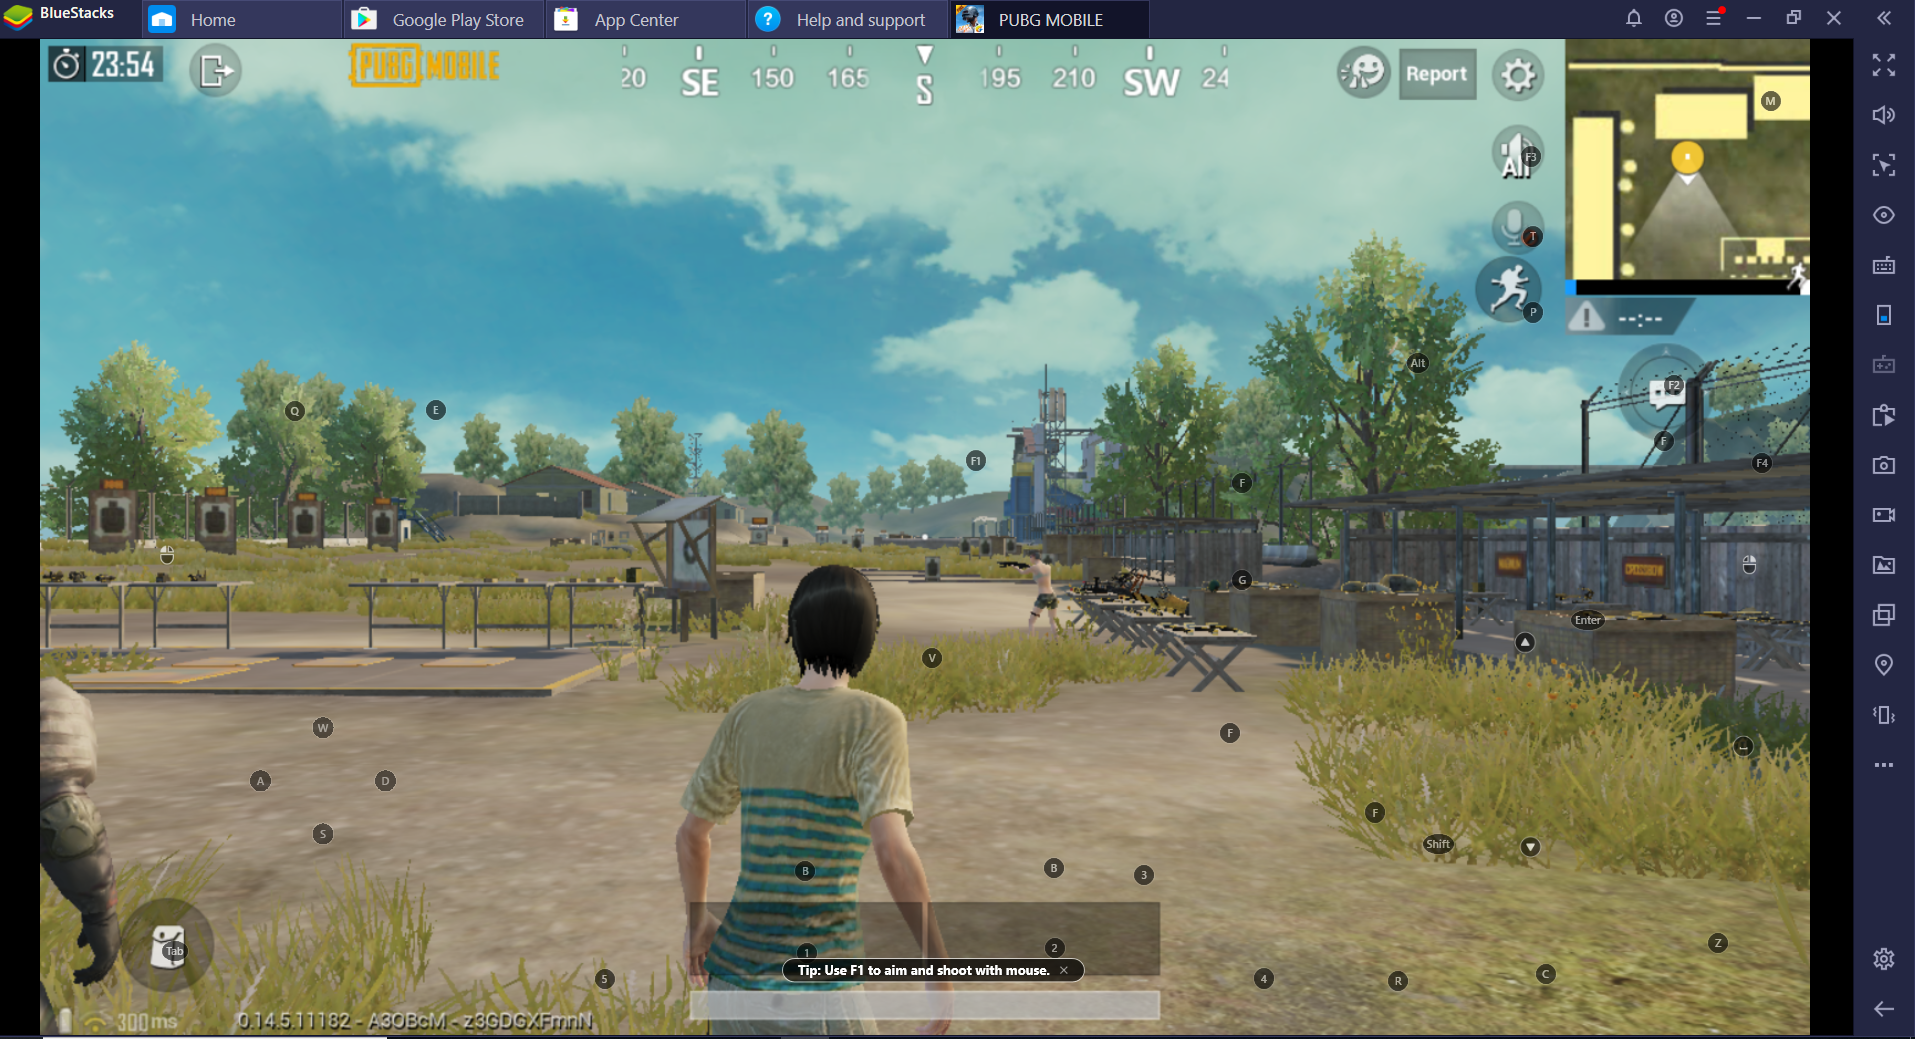
8. Yukarıdaki adımlar tamamlandıktan sonra, değişikliklerin oyuna yansıtıldığını görebilirsiniz.
Aşağıdaki ekran görüntüsünde oyuncu Çekim modunda.
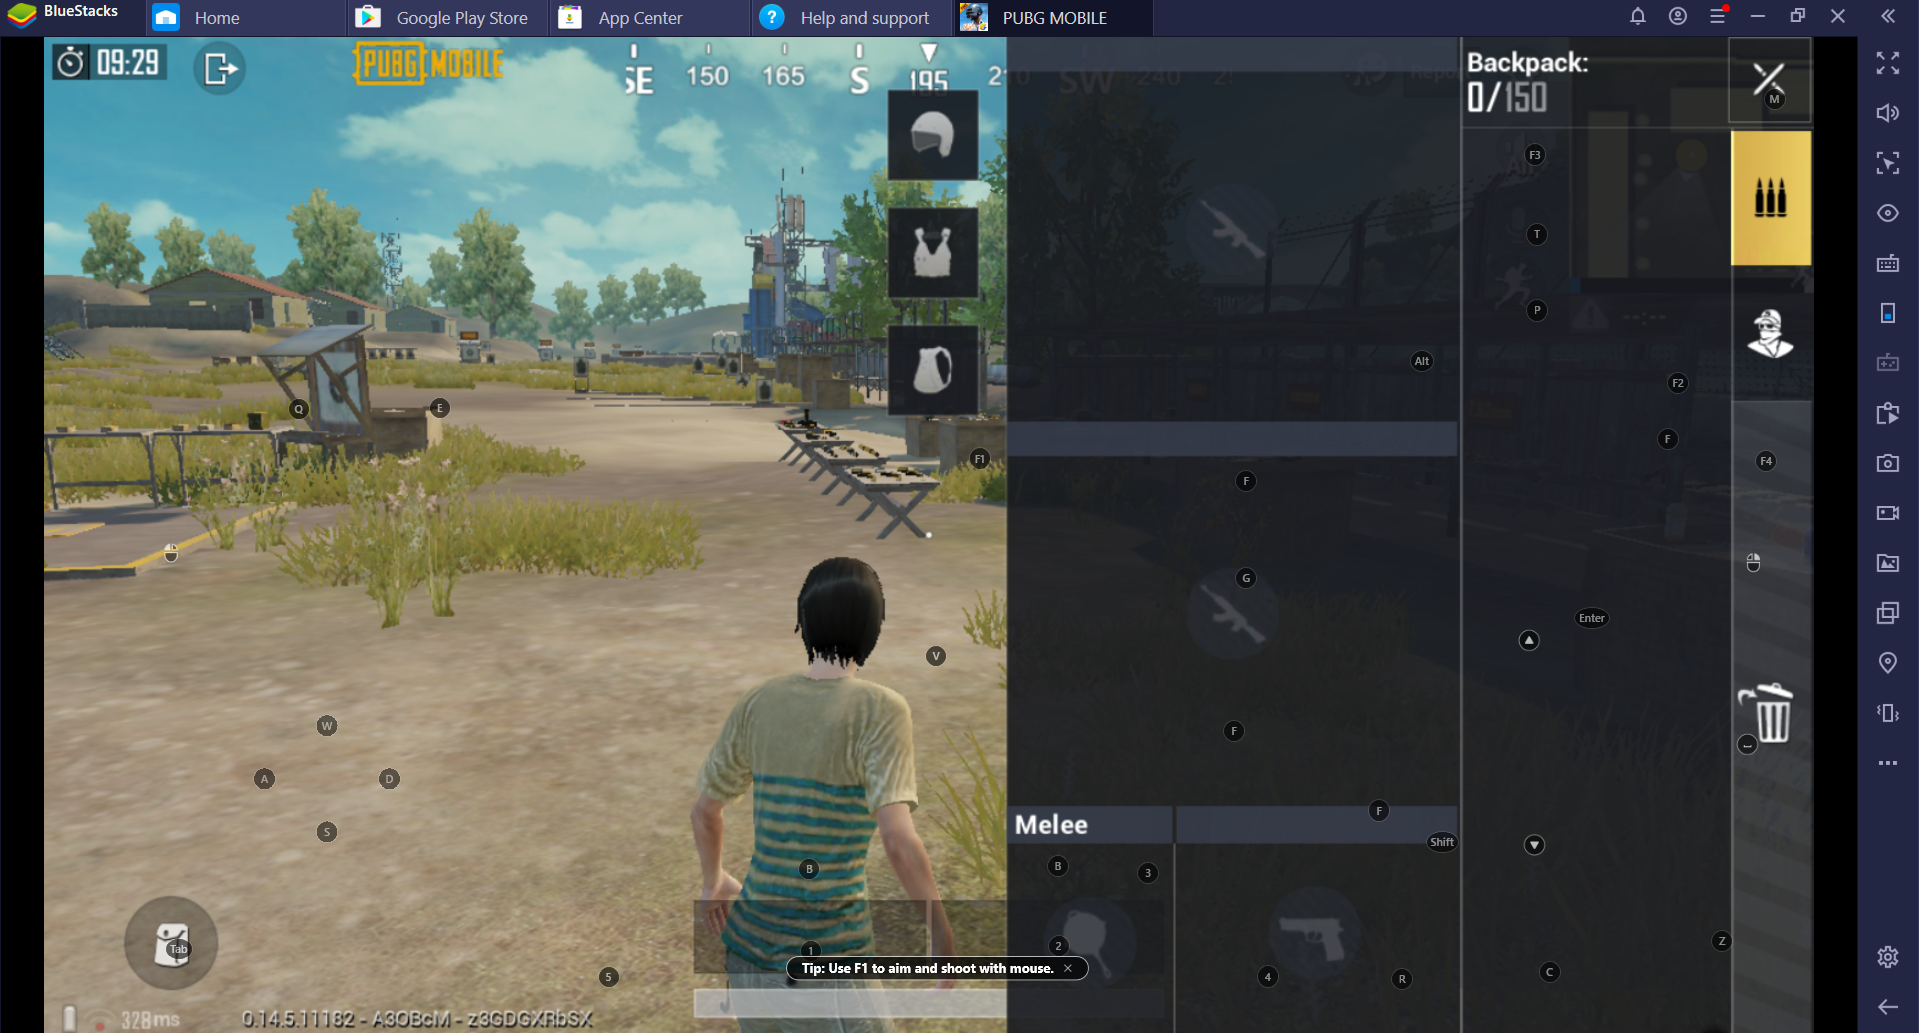
SEKME tuşuna basıldığında, çanta açılacak ve oyuncu Çekim modundan çıkacaktır.
Teşekkürler!