What are Advanced settings?
This detailed guide will explain the advanced settings that are available for the key controls in BlueStacks 5. To access the advanced settings for any control, either:
- Right-click on the key control
- Left-click on the gear icon underneath it
Once the advanced settings for the control open, select either the "Keyboard and mouse" or the "Gamepad" option to assign buttons or customize the settings for your preferred method of playing.
For some controls, you may also have to click on the "More settings" option afterward to access all the advanced settings.
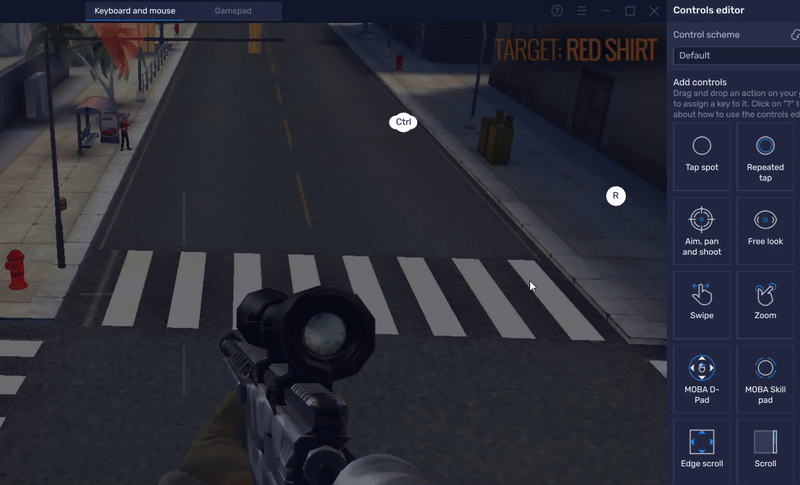
What are the advanced settings for different controls?
Click on the links below to learn about the advanced settings for all the controls in BlueStacks 5:
- Tap spot
- Repeated tap
- D-pad
- Aim, pan & shoot
- Free look
- Script
- Swipe
- Zoom
- Tilt
- MOBA D-Pad
- MOBA skill pad
- Rotate
- Edge scroll
- Scroll
Tap spot control
1. Key Bindings
- Tap key: You have the option of assigning a key for this control from within the Advanced settings.
2. Properties
- X and Y: You can enter the exact coordinates for placing the control on your gameplay screen.
Repeated tap control
If you click on the gear icon underneath this control, you get the following settings:
- Tap: Every time the assigned key is pressed, the selected number of taps will be performed.
- Long press: Until the assigned key is pressed, the control will keep performing the tap function.
Next, if you click on "More settings" or right-click on the key control, you will get the following settings:
1. Key Bindings
- Key: You can assign a key for this control from the Advanced settings.
2. Properties
- X and Y: You can enter the exact coordinates to place the control on your gameplay screen.
- Count: This lets you select the exact number of taps that will be performed every time the assigned key is pressed.
- Repeat until key up: If set to True, the tap function will be performed repeatedly, until the assigned key is press. If set to False, it will tap for the selected count, even if the key continues to be pressed.
D-pad control
1. Key Binding
- Up, Down, Left, Right: These let you assign the keys for moving in different directions.
- Speed Modifier 1 and 2: These let you assign keys to change the D-pad radius. By changing the radius, you can change the speed of your character. For example, in Call of Duty: Mobile you press SHIFT to increase the D-pad radius in order to sprint
2. Properties
- X and Y: You can enter the exact coordinates to place the control on your gameplay screen.
- Radius: This lets you set the D-pad size as per your preference.
- Radius 1: This lets you select the radius for Speed Modifier 1.
- Radius 2: This lets you select the radius for Speed Modifier 2.
- Speed: The speed at which the D-pad swipes. Some games allow up to a speed of 500 and in some games, a lower speed of 50 is better.
- Activation time: Lets you select the time between when the D-pad keys are pressed and when the D-pad actually functions within the game.
- Activation speed: Speed of the initial D-pad swipe. It can be used with the "Activation time" setting for better results in some cases.
- Dead zone radius: The minimum radius after which the D-pad swipe will start.
Aim, pan & shoot control
1. Key Bindings
- Start/Stop: Let's you assign a key to enter/exit panning mode to aim and fire your weapon.
- Suspend: This releases your mouse cursor temporarily, while the assigned key is pressed.
2. Properties
- X and Y: You can enter the exact coordinates to place the control on your gameplay screen.
- Mouse sensitivity X and Y: Lets you choose the sensitivity of the mouse while aiming in X-axis and Y-axis.
- Tweaks: Changes the behavior of the touch points and reset frequencies.
- Mouse acceleration: If you set this to True, you will be able to pan with respect to how fast you're moving your mouse.
3. Crosshair
On BlueStacks 5.12 and above, you can enable the toggle beside "Crosshair" to enhance your aiming accuracy even more!
To make your gameplay unique, you can change various aspects of the crosshair, such as:
- Style; choose from 4 built-in styles or add an image of your choice!
- Size
- Opacity
- Color
4. Fire with left click
- Fire with left click: Turn this on to fire your weapon with the left click of your mouse.
- Fire icon: Click on this icon and then place it on top of the in-game fire weapon control.
- Action position X and Y: You can enter the exact coordinates to place the Fire icon on your gameplay screen. At these coordinates, the "Fire with left click" function will work.
5. Look around mode
- Look around mode: Enable this setting to use the "Free look" control within the game. This lets you look around your character, without aiming your weapon.
- Eye icon: Click on this icon and then place it on top of the look around control.
- Free look: Let's you assign the key for using the "Free look" control.
Free look control
If you click on the gear icon underneath this control, you get the following settings:
- Mouse: Let's you use your mouse to look around in a game.
- Keyboard: Let's you use your keyboard to look around in a game.
Next, if you click on "More settings" or right-click on the key control, you will get the following settings:
1. Key Binding
- Key: Assign a key to begin using the "Free look" control, to look around in a game.
- Key up, Key down, Key left, Key right: These settings let you assign the keys for looking around in the different directions.
2. Properties
- X and Y: You can enter the exact coordinates to place the control on your gameplay screen.
- Device type: You can enter "0" here to use your keyboard to look around in-game. You can also enter "1" to use your mouse to look around in-game.
- Swipe speed: This lets you adjust the speed at which the control lets you look around in-game.
- Edge reset delay: Choose the milliseconds in which the touchpoint for looking around in-game will reset, after reaching the edge of the screen.
Script control
You can create and edit script commands that will allow you to perform sequences of actions in just one click of your assigned key.
First, you can open the Script Editor by clicking on the "<\>" icon under the script control, as shown below.
Here, you can enter script commands that will allow you to perform sequences of actions (such as keystrokes, mouse clicks, delays, etc) by pressing an assigned key. To learn how you can use scripts and the different script commands available, click here.
Next, if you right-click on the key control or click on the gear icon underneath it, you will get the following settings:
1. Key Bindings
- Key: Let's you change the assigned key for running any available script.
2. Properties
- Script X and Y: Lets you select the exact coordinates to place the control on your gameplay screen.
Swipe control
1. Key Bindings
- Swipe up, Swipe down, Swipe left, Swipe right: These settings let you assign keys for performing the swipe action in different directions.
2. Properties
- X and Y: You can enter the exact coordinates to place the control on your gameplay screen.
- Radius: This lets you set the size of the Swipe performed. You can increase the size by assigning a higher value.
- Speed: This lets you choose the speed at which the swipe actions are performed.
- Swipe & hold: If set to True, the swipe action will hold the last position it was on, until the assigned key is pressed.
If set to False, the swipe action will be performed and it will no longer stay at the screen, regardless of whether the assigned key is pressed.
Zoom control
1. Key Bindings
- Zoom in: Let's you assign a key to zoom in games.
- Zoom out: Let's you assign a key to zoom out of games.
- Modifier key: If assigned, the zoom function will work only when the assigned keys to Zoom in/Zoom out and the Modifier key are pressed.
2. Properties
- X and Y: You can enter the exact coordinates to place the control on your gameplay screen.
- Amplitude: Distance that will be zoomed in/out with 1 mouse scroll.
- Acceleration: Increases the X-times by which zooming is faster, while holding down the assigned key.
- Speed: Lets you choose the speed of zooming.
- Mode: Choose either mode 0 where both the tap points for zooming in/out move at the same speed, or mode 1 where one tap point moves faster than the other.
- Reset delay: Choose the milliseconds it takes to reset the tap points for zooming out.
- Override: If set to True, only the assigned keys will let you zoom in or out. But if Set to False, along with the assigned keys, "Ctrl" and "-" keys will zoom out and "Ctrl" and "=" keys will zoom in.
Tilt control
1. Key Bindings
- Up, Down, Left, Right: Let's you assign keys for performing the action of tilting your mobile device in different directions.
2. Properties
- X and Y: You can enter the exact coordinates to place the control on your gameplay screen.
- Tilt radius: This let's you set the size of the Tilt control.
- Speed: Let's you adjust the speed at which the tilt action is performed.
- Max tilt angle: Maximum degrees at which you want to perform the tilt.
- Auto reset: If set to True, the tilt action will be performed until the assigned key is pressed. Once you release the assigned key, it won't continue to tilt in any particular direction.
MOBA D-pad control
1. Key Bindings
- Movement: This is the mouse key assigned to activate D-pad. This is always set to Right Click.
2. Properties
- X and Y: You can enter the exact coordinates to place the control on your gameplay screen.
- Radius: Changes the size of the MOBA D-pad
3. Hero dummy
- Hero Dummy icon: Click on this icon and then place this near your character in a MOBA game for calibration.
- Hero speed: This lets you manage how far your character moves, when you right-click on a destination. If your Hero speed is high, the command to move will be given for a shorter time with every right-click and vice-versa. Therefore, you should increase the Hero speed if your character moves past the selected destination and reduce it if it stops beforehand.
4. Cancel movement
- Cancel movement: Enabling this allows you to assign a key to use for the cancel movement feature. Once you press this key, your character will stop moving.
- Cancel key icon: Click on it and then place it anywhere on the screen to use the cancel movement feature.
- Cancel: Here, you can assign the key for the cancel movement feature.
MOBA Skill pad control
If you click on the gear icon underneath this control, you get the following:
- Skill settings: Here, you can choose from Quick cast, Auto cast and Manual cast. Click here to learn more about these settings.
- Stop movement: This allows you to enable the stop movement function in MOBA games. Click here to learn more about it.
Next, if you click on "More settings" or right-click on the key control, you will get the following settings:
1. Key Bindings
- Activate: Let's you assign a key for casting your skill.
2. Properties
- X and Y: You can enter the exact coordinates to place the control on your gameplay screen.
- Radius: Changes the size of the MOBA Skill pad.
- Stop MOBA Dpad: Set this True/False to enable/disable the stop movement function.
3. Cancel skill
- Cancel skill: Enabling this allows you to assign a key to cancel a spell while you're aiming it at your enemies.
- Cancel skill icon: Click on it and place it on the Cancel skill button within the game.
- Cancel: Here, you can assign the key for the cancel the current skill being casted.
Rotate control
1. Key Bindings
- Clockwise: Let's you assign a key to spin the wheel in a game in clockwise direction.
- Anticlockwise: Let's you assign a key to spin the wheel in a game in anticlockwise direction.
2. Properties
- Origin X and Origin Y: You can enter the exact coordinates to place the control on your gameplay screen.
- XRadius: Changes the size of the Rotate control.
- Starting angle: Let's you set the angle at which the rotation function will start.
- Speed: Let's you change the speed at which the wheel rotation is performed.
- Activation time: This is the delay in the time between the assigned keys are pressed and the rotation action is performed in-game.
Edge scroll control
1. Properties
- X and Y: You can enter the exact coordinates to place the control on your gameplay screen.
- X velocity and Y velocity: The speed at which you can scroll through the X-axis and Y-axis of the map.
- X active margin and Y active margin: These let you select the X-axis margin and the Y-axis margin from the edge of the screen, where the mouse should be for Edge scroll to work.
- Speed up factor: The factor with which scroll speed will increase if the mouse is kept at the edge of screen.
- Reset delay: This is delay between two consecutive scrolls.
- Speed up wait time: Time in milliseconds after which speed up factor starts to apply.
- Enabled: If On, Edge scroll is active.
Scroll control
1. Properties
- Scroll X and Scroll Y: You can enter the exact coordinates to place the control on your gameplay screen.
- Speed: This lets you adjust the speed of scrolling through different apps on BlueStacks 5. Here, enter a larger value to increase the speed, or enter a smaller one to decrease it.
- Amplitude: This lets you increase or decrease the size of the swipe action.
- Override: If set to True, only the scroll control will work. If set to False, both your PC's mouse wheel and the scroll control will work.
Thank you for choosing BlueStacks. We hope you enjoy using it. If you have any further questions, please contact us at support@bluestacks.com. Happy Gaming!