WindowsでHyper-Vを無効にするには?

ここではHyper-Vを無効にする方法をご紹介します。

地域

すべての地域

Hyper-V無効化の手順:

以下の手順に従ってPC上でHyper-Vの無効化を行うことができます。

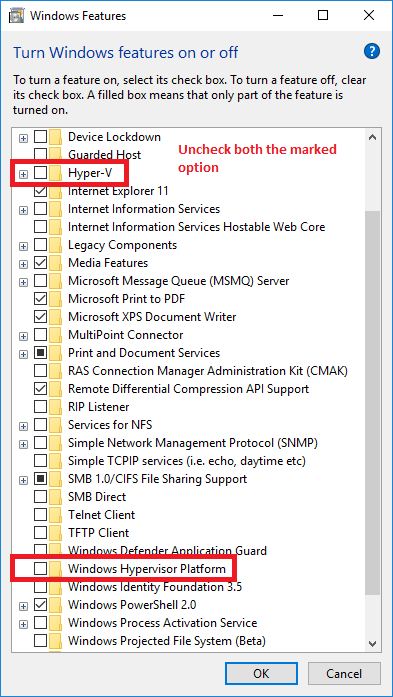
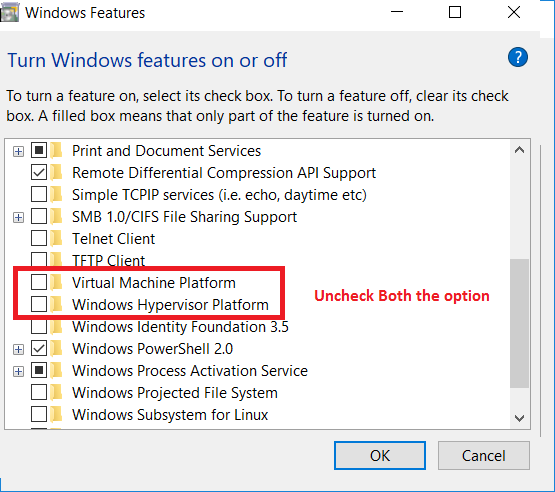
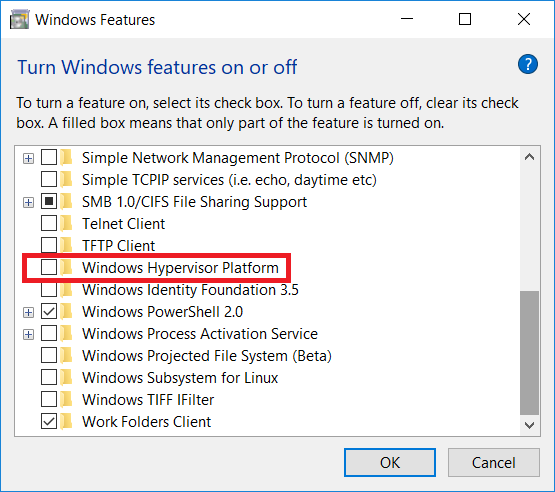
  1. コントロールパネル → プログラム → Windowsの機能の有効化または無効化します。


  2. Windowsの機能にあるHyper-Vのチェックを外し、OKをクリックします。

注記: Windowsの機能のオプションは、エディションやインストールされているWindowsのアップデートによって異なります。

  • 以下のエディションをお使いの場合は、Windowsの機能の画像を参照してください。

    Windows 8 Pro 64ビット版
    Windows 8 Enterprise 64ビット版
    Windows 8.1 Pro 64ビット版
    Windows 8.1 Enterprise 64ビット版
    Windows 10 Enterprise 64ビット版


  • Windows 10 Pro 64ビット版の場合


  • Windows 10 Home(バージョン1809)の場合


  • Windows 10 Home(バージョン1803)の場合


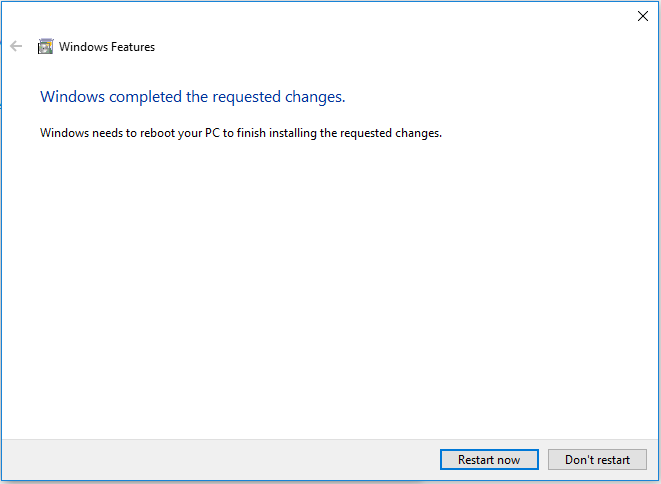
  1. Windowsの機能によって変更が適用され、再起動するように指示が出ます。PCを再起動して変更を適用してください。

    img2.PNG

いつもBlueStacksをご利用いただき、誠にありがとうございます。ご不明な点がございましたら、support at bluestacks dot com.までお知らせください。どうぞ宜しくお願いいたします。


最終更新日:2018年9月21日


この記事は役に立ちましたか?
17809人中6818人がこの記事が役に立ったと言っています
Reach out to us on Reddit (Join Reddit) or Discord (Join Discord) or at support@bluestacks.com with your questions.

We’d love to hear from you! Please take a moment to share your thoughts on the BlueStacks Help Center via this survey.
Subscribe to BlueStacks Weekly!
Get updates on new releases, features, and fixes. Discover trending games & enjoy exclusive gift codes!
By subscribing, I agree to receive weekly updates from the BlueStacks Help Center.
Thank you for subscribing to BlueStacks Weekly
Keep an eye on your inbox for updates on the latest features, gaming trends, bug fixes, gift codes, and much more!