If you're using BlueStacks 5, this article might not be relevant. You can view the BlueStacks 5 article for this by clicking here.
How will this help?
This article will guide you on how to enable Virtualization through BIOS in Windows 7, based on the brand or manufacturer of your PC.
You can also follow the steps described in this article, if you're unable to find the UEFI settings while trying to enable Virtualization in Windows 10, 8.1 or 8.
Click here to refer to the FAQ section given the end of this article.
How to enable Virtualization on:
How can I enable Virtualization on Dell Laptops?
1. Restart your PC.
2. At the boot screen, repeatedly tap the ESC key.

3. When a new screen appears, press the F10 key to enter BIOS setup.

4. Using the arrow keys, navigate to the Advanced tab and press the Enter key. Now, from the menu, select Virtualization and press Enter.
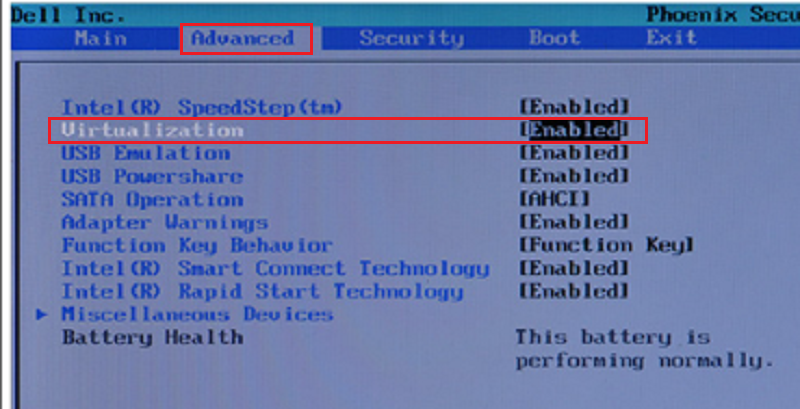
5. Select Enable and press Enter to save the changes. Lastly, reboot your system.
NOTE: In case your machine model does not have these settings, please check this Dell's official page for more info.
How can I enable Virtualization on HP Laptops?
1. Restart your PC.
2. At the time of startup, press the F2 key to enter BIOS.

3. Press the right arrow key and move to the System Configuration tab. Here, select Virtualization Technology and press Enter.
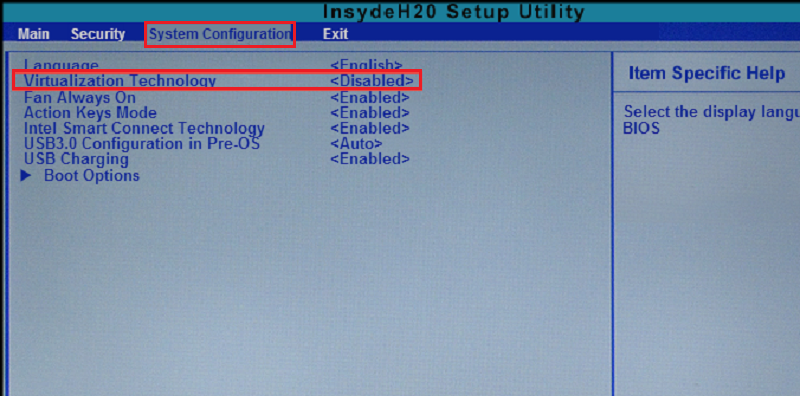
4. Select Enable and reboot your PC.
NOTE: In case your machine model does not have these settings, please check this HP's official page for more info.
How can I enable Virtualization on Asus Laptops?
1. Restart your PC.
2. At the time of startup, press the F2 key to enter BIOS.

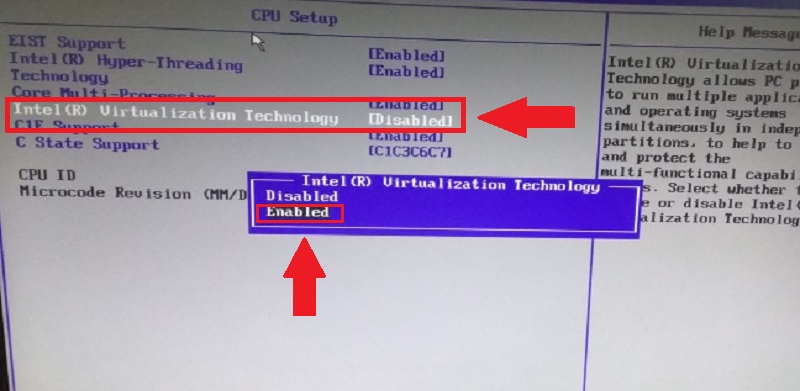
3. Using the arrow keys, navigate to the Advanced tab and press the Enter key. Now, from the menu, select Intel Virtualization Technology and press Enter.
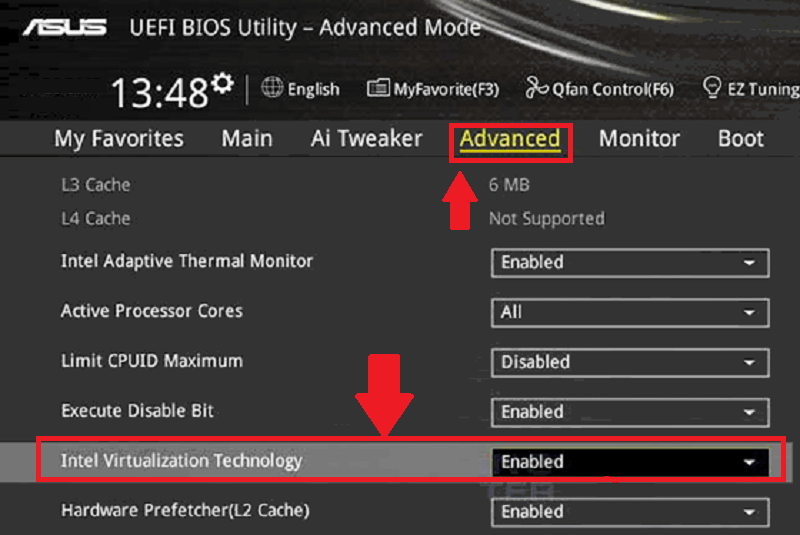
4. Select Enabled and press Enter to save the changes. Reboot your system.
NOTE: In case your machine model does not have these settings, please check this Asus's official page for more info.
How can I enable Virtualization on Acer Laptops?
1. Restart your PC.
2. At the time of startup, press the F2 key to enter BIOS.
NOTE: Few Acer laptops may require F1 or F12 to be pressed instead of the F2 key.

3. Press the right arrow key to System Configuration tab. Select Virtualization Technology and then press the Enter key.

4. Select Enabled and press the Enter key.
5. Press the F10 key and select Yes. Press the Enter key to save changes and reboot Windows.
NOTE: In case your machine model does not have these settings, please check this Acer's official page for more info.
How can I enable Virtualization on Lenovo Laptops?
1. Restart your PC.
2. At the time of startup, press the F1 or F2 key.
3. After a new screen appears, press the F12 key to enter BIOS.

4. Navigate to Security tab, then press the Enter key on Virtualization.
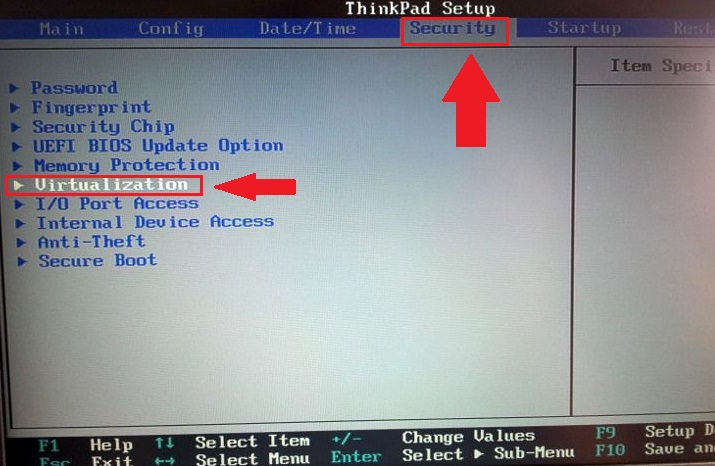
5. Select Intel(R) Virtualization Technology and press Enter. Here, choose Enabled and press Enter.
6. Press the F10 key and select Yes. Press the Enter key to save changes and reboot Windows.
NOTE: In case your machine model does not have these settings, please check this Lenovo's official page for more info.
Have some questions?
Q. I don't see my PC manufacturer in this list. What should I do?
A. Please check the official website of your PC manufacturer or their help center.
Q. Can I use BlueStacks without enabling virtualization?
A. BlueStacks can run with virtualization disabled but we highly recommend enabling virtualization to use BlueStacks smoothly. Not doing so may cause unexpected behavior of the software and its services
Q. My PC is listed in this article but the BIOS settings look different. How to proceed?
A. If your BIOS settings look different than those shown in this article, please refer to your computer manufacturer's official website for support.
Q. Is there a way to enable virtualization without going into the BIOS settings?
A. Read this detailed support article to know how to do it, based on which Windows you are running on your PC.
Q. I am unable to login to my Google account. Is it related to disabled virtualization on my PC?
A. Enabling virtualization is vital for running BlueStacks smoothly. Disabling it can cause issues like login problems, crashes, lag and more. We recommend you to enable virtualization for a better experience.
Thank you for choosing BlueStacks. We hope you enjoy using it. If you have any further questions, please contact us at support@bluestacks.com. Happy Gaming!
Last updated on June 30, 2020.