Purpose
This article will guide you on how to allocate more CPU cores on BlueStacks.
Benefits
Experience smooth performance on BlueStacks.
Audience
All users of BlueStacks.
Prerequisite
Hardware-assisted virtualization should be enabled on the system.
BlueStacks Versions affected
BlueStacks Version below 4.140.
Geo's affected
All Geo's
Steps:
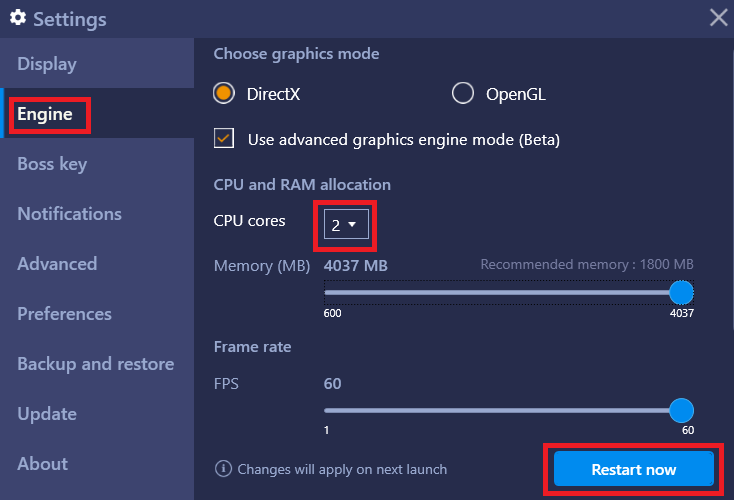
1. Click on the gear icon and select settings. In the "Settings" menu click on "Engine" and then select the desired CPU cores. The changes will be applicable after restarting BlueStacks. Please refer to the image below.
Troubleshooting: I am unable to add more CPU cores
If the hardware-assisted virtualization is disabled on the system, the CPU core cannot be allocated from the "Engine" tab in the settings drop-down menu.
You can also check for this exclamation mark on the top of the BlueStacks window, this appears when the machine does not meet recommended settings required to run BlueStacks.
Please make sure virtualization is enabled in the BIOS settings of your machine. Check this help article for steps to enable virtualization on your machine.
We genuinely appreciate your choosing BlueStacks. We hope you enjoy using it. If you have any further questions, please contact us at support at bluestacks dot com. Thank you very much.
Last updated on October 31st, 2019.